Important Notices:
•Return Reasons must be setup before credit memos and returns can be processed
oTo create return reasons navigate to:
Inventory > Files > Return Reasons
Code |
Up to 8 characters |
Description |
Up to 40 characters |
Reason Type |
O - Order Entry Return Reason |
Account |
(Optional, will use default) |
Inventory Adjustment Account |
(Optional, will use default) |
Apply to Spoilage |
Do not check |
Return to Stock |
If checked quantities will be returned to stock (customer returned a over shipment) If unchecked quantities will not be returned to stock (damaged goods being returned in unusable condition) |
Create a New Credit Memo
•Create credit memos by navigating to:
•Create a new order by clicking in the bottom left
•Select a customer in the Customer box
•Set an order date and date needed
oSales reports will include credit memos based on dates entered.
▪Many customers find it useful to apply credit memos to the same date as the original invoice to achieve the most accurate daily sales reports.
oDo not back-date into a period that has been closed in QuickBooks.
Change Payment Type to Credit Memo
•Click into the Payment Type box
•Press the right arrow key on keyboard until Credit Memo displays in Payment Type box
Adding Items to a Credit Memo

Adding items from the search line (dotted line to the right of the + in green circle)
•Search by any part of the item code or item description.
•Arrow key down to select the desired item.
•Tab to move to the Quantity field.
•Input the desired quantity
•Tab to move to the unit of measure field.
•Left or right arrow key to change the unit of measure.
•Tab to move to the Price field.
•Input the desired credit price.
•Enter key to commit the line item.
•Select a Return Reason (see below)
Adding items from the historical order guide (green background area below the search line)
•Click on an order line.
•Up or down arrow key to move to the next or previous order guide item.
•Input quantity to order.
•Tab to unit of measure or price field to change.
•Enter key or navigate to another line item to commit the line.
•Select a Return Reason (see below)
Specify Return Reason and Return Inventory to Stock Option
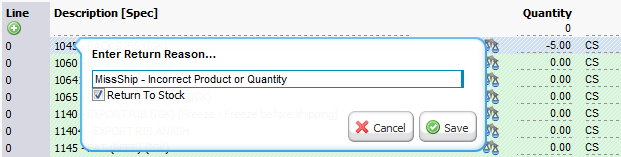
•Begin typing return reason Code or Description or press to view return reasons
•Return to Stock option will be checked or unchecked based on return reason code.
•Update Return to Stock option if needed.
•Click
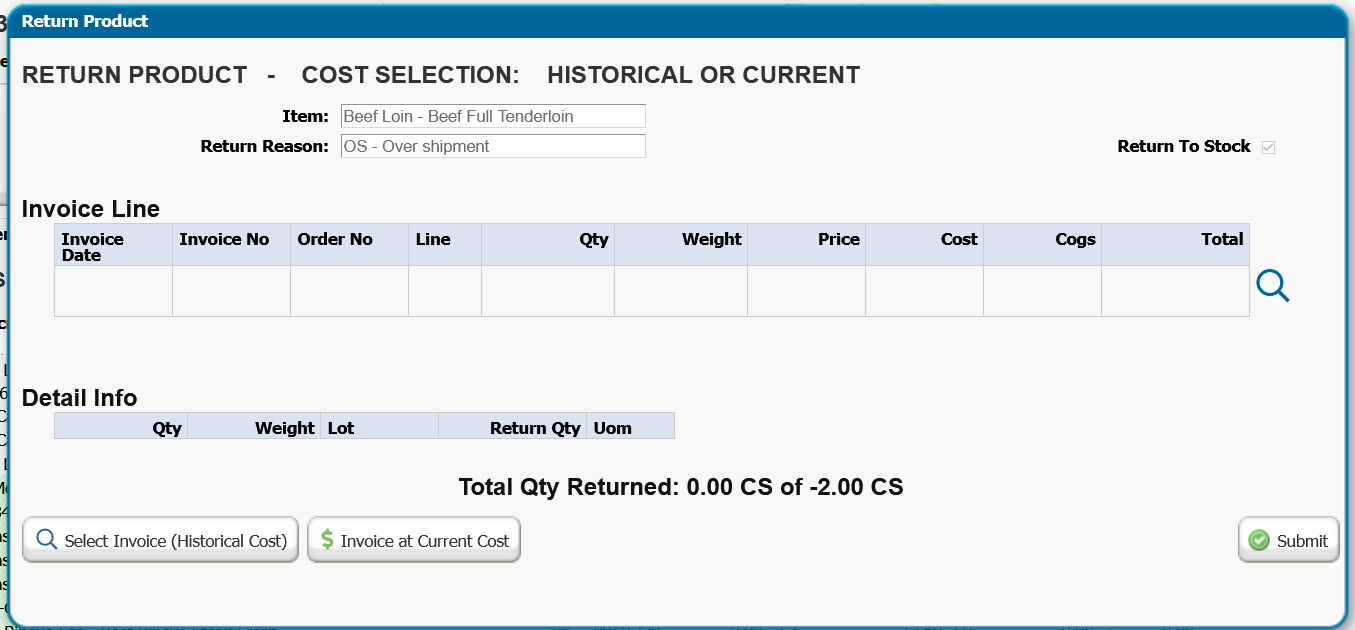
Select Historical Invoice or Use Current Cost of Goods Sold
If costs have changed since the original sale or an incorrect cost is being corrected the costs must be updated to properly reverse the costs associated with the sale. A new message box will display when adding credit lines (negative quantity) to a sales order. After selecting the return reason users will be prompted to select the previous invoice and if enabled previous line and lot. This will set the cost the line will be returned at equal to the cost from the previous invoice. If no previous invoice is available, or the user would prefer they can select the "Invoice at Current Cost" option. One of these choices must be made and submitted to create a credit line.
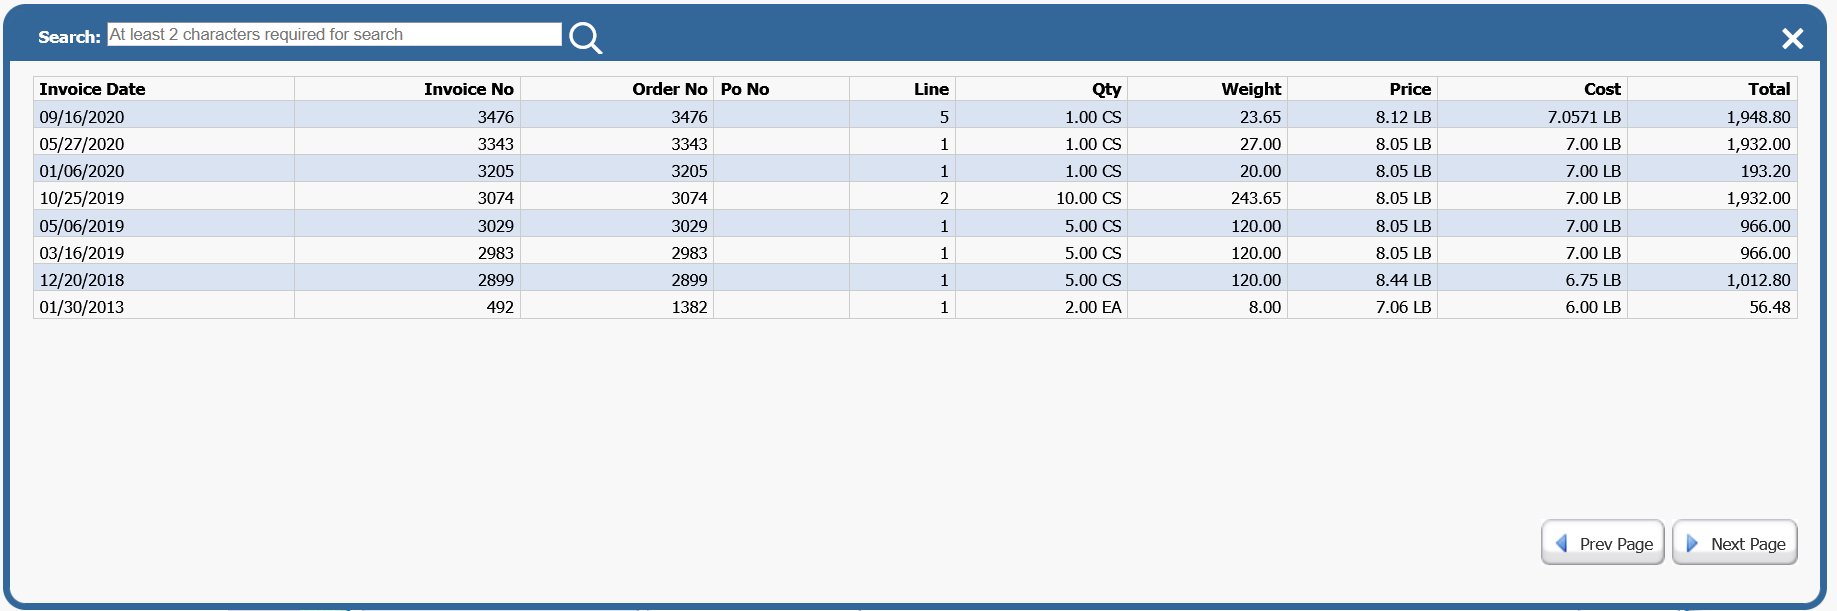
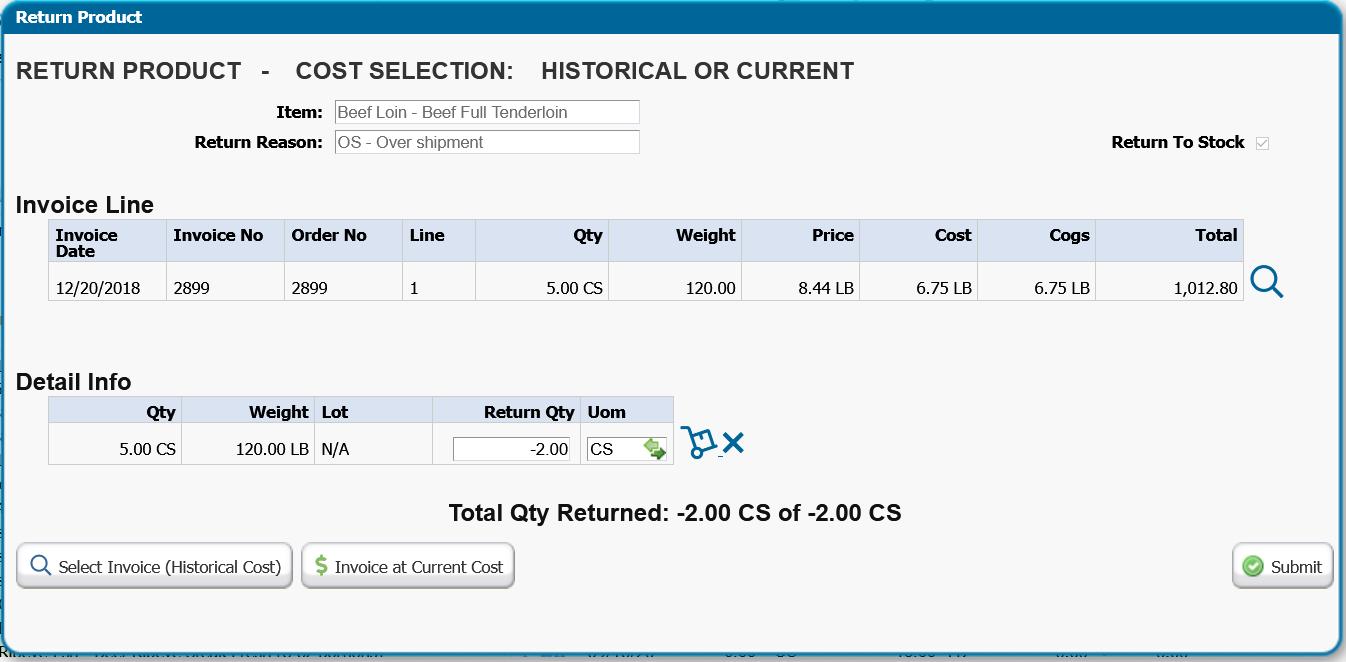
Click Select Invoice > Click on Invoice Line > Confirm quantity being returned and press submit.
or
Click Invoice at Current Cost > Click Submit
If a user would like to return quantities from multiple past invoices those must be entered as separate lines on the sales orders.
Fill, Ship, Invoice and Post
•Complete the credit memo using standard Fill, Ship and Invoice process.
•Quantities and weights will automatically be converted to negative amounts.
•Post the Credit Memo using the Invoice Post routine.
Apply Credit In QuickBooks
Credit Memos will show as available credit in QuickBooks to be applied to the customers remaining balances.